Putting BlogTO on the map (literally) – Tutorial

Kyle Larsen
SA8905 – Cartography and Geovisualization
Fall 2019

Instagram is a wealth of information, for better or worse, if you’ve posted to Instagram before and your profile is public, maybe even if it’s not, then your information is out there just waiting for someone, someone maybe like me, to scrape your information and put it onto a map. You have officially been warned.

But I’m not here to preach privacy or procure your preciously posted personal pics. I’m here to scrape pictures from Instagram, take their coordinates, and put them onto a map into a grid layout over Toronto. My target for this example is a quite public entity that thrives off exposure, the notorious BlogTo. Maybe only notorious if you live in Toronto, BlogTo is a Toronto-based blog about the goings on in the 6ix as well as Toronto life and culture, they also have an Instagram that is almost too perfect for this project – but more on that later. Before anything is underway a huge thank-you-very-much to John Naujoks and his Instagram scraping project that created some of the framework for this project (go read his project here, and you can find all of my code here)

When scraping social media sometimes you can use an API to directly access the back end of a website, Twitter has an easily accessible API that is easy to use. Instagram’s API sits securely behind the brick wall that is Facebook, aka it’s hard to get access to. While it would be easier to scrape Twitter, we aren’t here because this is easy, maybe it seems a little rebellious, but Instagram doesn’t want us scraping their data… so we’re going to scrape their data.

This will have to be done entirely through the front end, aka the same way that a normal person would access Instagram, but we’re going to do it with python and some fancy HTML stuff. To start you should have python downloaded (3.8 was used for this but any iteration of python 3 should give you access to the appropriate libraries) as well as some form of GIS software for some of the mapping and geo-processing. Alteryx would be a bonus but is not necessary.

We’re going to use a few python libraries for this:

  • urllib – for accessing and working with URLs and HTML
  • selenium – for scraping the web (make sure you have a browser driver installed, such as chromedriver)
  • pandas – for writing to some files

If you’ve never done scraping before, it is essentially writing code that opens a browser, does some stuff, takes some notes, and returns whatever notes you’ve asked it to take. But unlike a person, you can’t tell python to go recognize specific text or features, which is where the python libraries and HTML stuff comes in. The below code (thanks John) takes a specific Instagram user and return as many post URLs as you want and adds them to a list, for your scraping pleasure. If you enable the browser head you can actually watch as python scrolls through the Instagram page, silently kicking ass and taking URLs. It’s important to use the time.sleep(x) function because otherwise Instagram might know what’s up and they can block your IP.

But what do I do with a list of URLs? Well this is where you get into the scrappy parts of this project, the closest to criminal you can get without actually downloading a car. The essentials for this project are the image and the location, but this where we need to get really crafty. Instagram is actually trying to hide the location information from you, at least if you’re scraping it. Nowhere in a post are coordinates saved. Look at the below image, you may know where the Distillery District is, but python can’t just give you X and Y because it’s “south of Front and at that street where I once lost my wallet.”

If you click on the location name you might get a little more information but… alas, Instagram keeps the coordinates locked in as a .png, yielding us no information.

BUT! If you can scrape one website, why not another? If you can use Google Maps to get directions to “that sushi restaurant that isn’t the sketchy one near Bill’s place” then you might as well use it to get coordinates, and Google actually makes it pretty easy – those suckers.
(https://www.google.com/maps/place/Distillery+District,+Toronto,+ON/@43.6503055,-79.35958,16.75z/data=!4m5!3m4!1s0x89d4cb3dc701c609:0xc3e729dcdb566a16!8m2!3d43.6503055!4d-79.35958 )
I spy with my little eye, some X and Y coordinates, the first set after the ‘@’ would usually be the lat/long of your IP address, which I’ve obviously hidden because privacy is important, that’s the takeaway from this project right? The second lat/long that you can gleam at the end of the URL is the location of the place that you just googled. Now all that’s left is to put all of this information together and create the script below. Earlier I said that it’s difficult to tell python what to look for, and what you need is the xpath, which you can copy from the html (right-click an element and then right-click that html and then you can get the xpath for that specific element. For this project we’re going to need the xpath for both the image and the location. The steps are essentially as follows:

  • go to Instagram post
  • download the image
  • copy the location name
  • google the location
  • scrape the URL for the coordinates

There are some setbacks to this, not all posts are going to have a location, and not all pictures are pictures – some are videos. In order for a picture to qualify for full scraping it has to have a location and not be a video, and the bonus criteria – it must be in Toronto. Way back I said that BlogTO is great for this project, that’s because they love to geotag their posts (even if it is mostly “Toronto, Ontario”) and they love to post about Toronto, go figure. With these scripts you’ve built up a library of commands for scraping whatever Instagram account your heart desires (as long as it isn’t private – but if you want to write script to log in to your own account then I guess you could scrape a private account that has accepted your follow request, you monster, how dare you)

With the pics downloaded and the latitudes longed it is now time to construct the map. Unfortunately this is the most manual process, but there’s always the arcpy library if you want to try and automate this process. I’ll outline my steps for creating the map, but feel free to go about it your own way.

  1. Create a grid of 2km squares over Toronto (I used the grid tool in Alteryx)
  2. Intersect all your pic-points with the grid and take the most recently posted pic as the most dominant for that grid square
  3. Mark each square with the image that is dominant in that square (I named my downloaded images as their URLs)
  4. Clip all dominant images to 1×1 size (I used google photos)
  5. Take a deep breath, maybe a sip of water
  6. Manually drag each dominant image into its square and pray that your processor can handle it, save your work frequently.

This last part was definitely the most in need of a more automated process, but after your hard work you may end up with a result that looks like the map below, enjoy!

Automobile Collisions Involving TTC Vehicles

Eric Lum
SA8905 Geovis Project, Fall 2019

Toronto is the largest metropolis in Canada, attracting people from far and wide. As such, there are many forms of transportation that pass through the city including cars, bicycles, public transit, regional trains and many more. The Toronto Transit Commission (TTC) is one of the main methods that people rely on, as millions ride their services each and every day. All of these forms of transportation must share the roads, and from time to time collisions occur. This project aims to animate collisions between TTC surface vehicles such as a bus or streetcar, with another form of transportation (not including pedestrians). This visualization will be on the web-mapping service Carto, where a time series map will be produced on the various TTC related collisions.

The collision data for this project was obtained from the Toronto Police open data portal. The “TTC Municipal Vehicle” dataset that was used is a subset of the “Killed and Seriously Injured” dataset, as these are the specific types of collisions that were collected. The data is available for the years 2008-2018, but only the past five years from 2014-2018 were used for the sample size of the project. Information on the collisions provided in the dataset include the latitude, longitude, intersection, vehicle collision type, time, date, year and neighbourhood it occurred in.

The first step of getting the time series web map to work is to create a map and import the data into Carto. The collisions data was downloaded from the Toronto Police as a .csv file, which can easily be uploaded to Carto. Other supporting data used for this map includes the City of Toronto boundary file retrieved from the City of Toronto open data portal and the TTC routes which were retrieved from Scholars Geoportal. In order for these shapefiles to be imported into Carto, they must either be uploaded as .ZIP files or converted to another supported format such as JSON file. Once all the data was ready, it was uploaded through the “Connect Dataset” label shown below.

The next step was to geocode the collision locations with the latitude and longitude provided in the collisions .csv file. This was done through Carto’s geocode feature shown below. To do this, the layer with the data was selected and the geocode option was chosen under the “Analysis” tab. The fields for latitude and longitude were then input.

Once geocoded, the “Aggregation” method for the data needed to be chosen. As this is a visualization project over a span of years, the time series option was chosen. The “Style” also needed to be set, referring to how the points would be displayed. The dataset contained information on the different vehicle types that were involved in the collisions, so the “point colour” was made different for each vehicle. These functions are both shown below.

The same “Style” method for visualization was also applied to the TTC Routes layer, as each type of transportation should be shown with a unique colour. The last part in animating the data is to choose the field for which the timer series is to be based on. The date field in the collisions .csv file was used in the “Widgets” function on Carto. This allows for all the data to be shown on a histogram for the entire time span.

To finalize the map, a legend and basemap were selected. Once happy with my map, I made it public by enabling the “Publish” option at the bottom of the interface. This generated a shareable link for anyone to view.

A snapshot of the final time series map is shown below.

Thank you for viewing my blog post!

To access the full web map on Carto, the link is provided here:

https://ericlum24.carto.com/builder/00c16070-d0b8-4efd-97db-42ad584b9e14/embed

Visualizing Station Delays on the TTC

By: Alexander Shatrov

Geovis Project Assignment @RyersonGeo, SA8905, Fall 2018.

Intro:

The topic of this geovisualization project is the TTC. More specifically, the Toronto subway system and its many, many, MANY delays. As someone who frequently has to suffer through them, I decided to turn this misfortune into something productive and informative, as well as something that would give a person not from Toronto an accurate image of what using the TTC on a daily basis is like. A time-series map showing every single delay the TTC went through over a specified time period.  The software chosen for this task was Carto, due to its reputation as being good at creating time-series maps.

Obtaining the data:

First, an excel file of TTC subway delays was obtained from Toronto Open Data, where it is organised by month, with this project specifically using August 2018 data. Unfortunately, this data did not include XY coordinates or specific addresses, which made geocoding it difficult. Next, a shapefile of subway lines and stations was obtained from a website called the “Unofficial TTC Geospatial Data”. Unfortunately, this data was incomplete as it had last been updated in 2012 and therefore did not include the recent 2017 expansion to the Yonge-University-Spadina line. A partial shapefile of it was obtained from DMTI, but it was not complete. To get around this, the csv file of the stations shapefile was opened up, the new stations added, the latitude-longitude coordinates for all of the stations manually entered in, and the csv file then geocoded in ArcGIS using its “Display XY Data” function to make sure the points were correctly geocoded. Once the XY data was confirmed to be working, the delay excel file was saved as a csv file, and had the station data joined with it. Now, it had a list of both the delays and XY coordinates to go with those delays. Unfortunately, not all of the delays were usable, as about a quarter of them had not been logged with a specific station name but rather the overall line on which the delay happened. These delays were discarded as there was no way to know where exactly on the line they happened. Once this was done, a time-stamp column was created using the day and timeinday columns in the csv file.

Finally, the CSV file was uploaded to Carto, where its locations were geocoded using Carto’s geocode tool, seen below.

It should be noted that the csv file was uploaded instead of the already geocoded shapefile because exporting the shapefile would cause an issue with the timestamp, specifically it would delete the hours and minutes from the time stamp, leaving only the month and day. No solution to this was found so the csv file was used instead. The subway lines were then added as well, although the part of the recent extension that was still missing had to be manually drawn. Technically speaking the delays were already arranged in chronological order, but creating a time series map just based on the order made it difficult to determine what day of the month or time of day the delay occurred at. This is where the timestamp column came in. While Carto at first did not recognize the created timestamp, due to it being saved as a string, another column was created and the string timestamp data used to create the actual timestamp.

Creating the map:

Now, the data was fully ready to be turned into a time-series map. Carto has greatly simplified the process of map creation since their early days. Simply clicking on the layer that needs to be mapped provides a collection of tabs such as data and analysis. In order to create the map, the style tab was clicked on, and the animation aggregation method was selected.

The color of the points was chosen based on value, with the value being set to the code column, which indicates what the reason for each delay was. The actual column used was the timestamp column, and options like duration (how long the animation runs for, in this case the maximum time limit of 60 seconds) and trails (how long each event remains on the map, in this case set to just 2 to keep the animation fast-paced). In order to properly separate the animation into specific days, the time-series widget was added in the widget tab, located next to to the layer tab.

In the widget, the timestamp column was selected as the data source, the correct time zone was set, and the day bucket was chosen. Everything else was left as default.

The buckets option is there to select what time unit will be used for your time series. In theory, it is supposed to range from minutes to decades, but at the time of this project being completed, for some reason the smallest time unit available is day. This was part of the reason why the timestamp column is useful, as without it the limitations of the bucket in the time-series widget would have resulted in the map being nothing more then a giant pulse of every delay that happened that day once a day. With the time-stamp column, the animation feature in the style tab was able to create a chronological animation of all of the delays which, when paired with the widget was able to say what day a delay occurred, although the lack of an hour bucket meant that figuring out which part of the day a delay occurred requires a degree of guesswork based on where the indicator is, as seen below

Finally, a legend needed to be created so that a viewer can see what each color is supposed to mean. Since the different colors of the points are based on the incident code, this was put into a custom legend, which was created in the legend tab found in the same toolbar as style. Unfortunately this proved impossible as the TTC has close to 200 different codes for various situations, so the legend only included the top 10 most common types and an “other” category encompassing all others.

And that is all it took to create an interesting and informative time-series map. As you can see, there was no coding involved. A few years ago, doing this map would have likely required a degree of coding, but Carto has been making an effort to make its software easy to learn and easy to use. The result of the actions described here can be seen below.

https://alexandershatrov.carto.com/builder/8574ffc2-9751-49ad-bd98-e2ab5c8396bb/embed

Mapping Toronto Green Space in Android

By Jacob Lovie | GeoVis Project Assignment                @RyersonGeo | SA8905 | Fall 2018

Introduction

With today’s technology becoming more and more mobile, and the ability to access everything you need on your mobile device, it is more important than even to ensure that GIS is evolving to meet these trends. My GeoVisualization project focused on designing an android application to allow users to explore Toronto’s green space and green initiatives, making layers such as parks and bike stations accessible in the palm of your hand. However, it is not just having access to this that is important. What’s important when working with these technologies is that a user can explore the map and retrieve the information seamlessly and efficiently.

Data and Hosting Feature Services

All the data for the project was retrieved from the city of Toronto’s open data portal. From there, all the data was uploaded to ArcGIS Online and set up as hosted feature services. A base map was also designed using ArcGIS for Developers and hosted. The application was able to target these hosted feature layer and use them in the map, making the size of the app small. The symbology and setup of the hosted feature layers was also done in ArcGIS online, so the app didn’t have to make any changes or set symbology when it wasn’t necessary.

Methods

The developer environment that I worked in to design my app was Android Studio, the baseline for designing any android apps. The programming language used in Android Studio is Java. Within Android Studio, the functionality of ArcGIS Runtime Software Developer Kit (SDK) for Android can be brought in, bringing in all the libraries and functions associated with ArcGIS Runtime SDK for Android. With this I was able to use ArcGIS functionality in android, designing maps, accessing hosted feature services, and perform geoprocessing.

Understanding how ArcGIS SDK for Android worked with in Android Studio was an important key in designing my app. When creating a map, I first had to create a Map object. An object is a variable that is of a certain datatype. If you were talking about having a text object as a variable that could be called, it would be of datatype string, and the word itself would be an object that is callable and referential. The Map object is what is displayed in an activity window (more on this later), which is what the user visualizes when using the app. The map can be set to view a certain area, which was Toronto in my app. A user can pan around the map like they would on any interactive map without having additional coding in Android Studio (it is natural to the Map datatype). The Map also has associated Layer objects that have their own set of parameters.

While designing my app, any time I would want something done in my design, such as creating a map object or adding a layer to a map object, I created a function that wold performs an action. This reduces repetition in the code when I attempted to do something complex multiple times. I designed 3 functions. The first was to create a Map, the second was to add a Layer that could be activated and deactivated in the Map through a switch that would be displayed in the main Activity Window. The final function added a layer that could be queried and would extract information from that layer.

When designing an android app, there are many fine details that are not necessarily considered when using an app on your phone. Simple things like having a window or text appear, opening a second window, or displaying information were things I very much appreciated after designing the app. Within my app, I wanted to display a second activity window to display information on neighbourhoods in Toronto when the user touched them. Within Android Studio this required creating a second activity window, and transferring the information obtained in the map to the second activity. This was done through my displayInformation function. I was then able to create a second activity and display this information using a custom list display to show the attribute data of a selected neighbourhood.

     >>>>>>>>>>>     

Setting up the display in Android Studio is relatively simple. There is an interface that allows you to anchor different objects to parts of the screen. This allows the app to run smoothly across all devices, not based on the size and ratio of the device. The switches in my Main Activity window were anchored to the top left, and to each other. My Map is in the background, but appears as white in this activity window.

The Application

Once all the coding and testing was completed, running the app was simple. I was able to bundle my code and send it to my personal phone, a Galaxy S9. The functions called the hosted service layers and displayed them in the map (Wifi or internet connection was required). I was also able to click on neighbourhoods and it would open my second activity that displayed the attribute information of that neighbourhood. If you want a more in-depth look at my code, it is available at https://github.com/jclovie/GeoVis-Ryerson/.

Creating a Toronto City Ward Model Using Laser Cut Acrylic

by Selasi Dorkenoo

SA8905 Cartography and Geovisualization Fall 2018

To better understand characteristics of the new municipal electoral wards in the City of Toronto, the new 25-ward boundary shapefile provided by the City of Toronto was converted to vector format and laser cut into five translucent sheets of acrylic. Each piece is engraved with the ward ID. Laser cutting allows the puzzle to not only fit together with precision, but also visualized the demographic census data using redundant symbology: opacity (lightness) and height.

Ward boundaries were retrieved from Toronto Open Data Catalogue and imported into ArcGIS Desktop. The model was designed to be cut into 16 in x 8.5 in sheets of 3mm acrylic, including legend items and a scale bar. Features in black (below) represent pieces that were laser cut and features in red represent laser engraving on a piece. Using layout view, the design was exported as a vector (.ai) file and sent to Hot Pop Factory for their laser cutting services.

Once the acrylic was cut, a magnet was super-glued to each piece below the engraved ward IDs. The magnets used were about 6mm in diameter and 2mm in thickness. Magnets were also attached to the scale bar and legend items. Using a magnetic white board as a base for the model, the pieces were stacked and the model itself was complete.


Demographic data at the ward level was retrieved from Toronto Open Data Catalogue as well. Once joined to the ward boundary file, a set of choropleth maps including population density, visible minorities, unemployment rate and average personal income were created. A maximum of five bins can be used to classify the data in each map since only five sheets of acrylic were laser cut for the model.

A catalogue of these maps was printed and packaged with the ward model. Users can browse through the catalogue and select which variable they wish to map. Using dry erase markers they can write the necessary cartographic elements on the mapped area (i.e. legend labels and title).

Movies and Television shows filmed in Toronto but based elsewhere…

by Alexander Pardy
Geovis Class Project @RyersonGeo, SA8905, Fall 2017

Data and Data Cleaning:

To obtain my data I used https://moviemaps.org/ and selected Toronto  the website displays a map that shows locations in the Greater Toronto Area  where movies and television shows were filmed. The point locations are overlaid on top of Google Maps imagery.

If you use the inspect element tool in internet explorer, you can find a single line of JavaScript code within the map section of the webpage that contains the latitude and longitude of every single point.

The data is in a similar format to python code. The entire line of JavaScript code was inputted into a Python script.  The python script writes the data into a CSV file that can then easily be opened in Microsoft Excel. Once the file was opened in Excel, Google was used to search for the setting of each and every single movie or television show, using the results of various different websites such as fan websites, IMDB, or Wikipedia. Some locations take place in fictional towns and cities, in this case locations were approximated using best judgement to find a similar location to the setting. All the information was than saved into a CSV file. Python was then used to delete out any duplicates in the CSV file and was used to give a count of each unique location value. This gives the total number of movies and television shows filmed at each different geographical location. The file was than saved out of python back into a CSV file. The latitude and longitude coordinates for each location was than obtained from Google and inputted into the CSV file.  An example is shown below.

Geospatial Work:

The CSV file was inputted into QGIS as a delimited text layer with the coordinate system WGS 84. The points were than symbolized using a graduated class method based on a classified count of the number of movies or television shows filmed in Toronto. A world country administrative shape file was obtained from the Database of Global Administrative Areas (GADM). There was a slight issue with this shapefile,  the shapefile had too much data and every little island on the planet was represented in this shapefile. Since we are working at a global scale the shapefile contained too much detail for the scope of this project.

Using WGS 84 the coordinate system positions the middle of the map at the prime meridian and the equator. Since a majority of the films and television shows are based in North America,  a custom world projection was created. This was accomplished in QGIS by going into Settings, Custom CRS, and selecting World Robinson projection. The parameters of this projection was then changed to change the longitude instead of being the prime meridian at 0 degrees, it was changed to -75 degrees to better center North America in the middle of the map. An issue came up after completing this is that a shapefile cannot be wrapped around a projection in QGIS.


After researching how to fix this, it was found that it can be accomplished by deleting out the area where the wrap around occurs. This can be accomplished by deleting the endpoints of where the occurrence happens. This is done by creating a text file that says:

This text box defines the corners of a polygon we wish to create in QGIS.  A layer  can now be created from the delimited text file, using custom delimiters set to semi colon and well-known text. It creates a polygon on our map, which is a very small polygon that looks like a line. Then by going into Vector, Geoprocessing Tools, Difference and selecting the input layer as the countries layer and the difference layer as the polygon that was created. Once done it gives a new country layer with a very thin part of the map deleted out (this is where the wrap around occurred). Now the map wraps around fine and is not stretched out. There is still a slight problem in Antarctica so it was selected and taken out of the map.

Styling:

The shapefile background was made grey with white hairlines to separate the countries. The count and size of the locations was kept the same. The locations were made 60% transparent. Since there was not a lot of  different cities the  symbols were classified to be in 62 classes, therefore each time the number increased, the size of the point would increase.  The map is now complete. A second map was added in the print composer section to show a zoomed in section of North America. Labels and lines were then added into the map using Illustrator.

Story Map:

I felt that after the map was made a visualization should also be created to help covey the map that was created by being able to tell a story of the different settings of films and television shows that were filmed in Toronto.  I created a ESRI story map that can be found Here .

The Story Map shows 45 points on a world map, these are all based on the setting of television shows and movies that were filmed in the City of Toronto. The points on the map are colour coded. Red point locations had 4-63 movie and television shows set around the points. Blue point locations had 2-3 movie and television shows set around the points. Green point locations had 1 movie or television show set around the point. When you click on a point it brings you to a closer view of the city the point is located in. It also brings up a description that tells you the name of the place you are viewing and the number of movies and television shows whose settings takes place in that location. You also have the option to play a selected movie or television show trailer from YouTube in the story map to give you an idea of what was filmed in Toronto but is conveyed by the media industry to be somewhere else.

#AddressingTheSurface Translucent Maps inspired by GIS and Open Data

by Edgar Baculi #themapmaker
Geovisualization Project @RyersonGeo, SA8905, Fall 2017

#AddressingTheSurface was a collaborative geovisualization project with recent OCAD University graduate, Graphic Designer and Fine Artist Jay Ginsherman, with ideas and direction from Ryerson University, Master of Spatial Analysis candidate Edgar Baculi. This project was inspired by the previous work of Ginsherman entitled ‘Liquid Shadows’ using translucent images or maps as well as a lighting device nicknamed the ‘Lightbox’. This piece along with Ginsherman’s previous and on-going work can be found here http://jginsherman.format.com/. While attending OCAD University’s 102nd GradEx, Baculi encountered the work of Ginsherman and the GIS like experience of the attendees. From this the idea of using open data and actual GIS to produce a piece had begun.

After consulting with Ginsherman a piece based on the lived experience of Baculi, open data and GIS was established. Having previous research work in open data, Baculi was familiar with exploring and downloading open data. The Toronto Open Data Catalogue provided all the data relevant to the project. The key focus of the data collection were datasets related to Toronto Community Housing and services of interest for these residents and other locations.

The following datasets were downloaded and manipulated from the catalogue:
1. Toronto Community Housing Corporation Residences (with high, mid and low rise buildings selected and divided into three map layers)
2. The boundary of the city of Toronto (dissolved former municipality shape file)
3. City of Toronto Neighbourhoods
4. Street file
5. Fire Stations
6. Police Stations
7. Park Land
8. TTC Subway lines
9. Three heat/ kernel density maps on services of interest for TCHC residents (based on Rent Bank Centres, Community Cooling Centres and Shelters.

A key aspect of this project was the use of subtractive colours (Magenta, Yellow and Cyan) for the heat maps to show interesting overlap, resulting in new colours. The overlap of colours were designed intentionally to be open to interpretation to the map readers.

Using ArcGIS the previously mentioned datasets were adjusted by Baculi with ideal symbology before being sent to Ginsherman. The discussions between Baculi and Ginsherman involved understanding how GIS works and cartographic ideals for the look of the maps, with great design to appeal to the audience. Baculi wanted to create a hands on GIS experience, with a legend that built itself up and remained legible to the map reader. Ginsherman incorporated these ideals into the final look under Baculi’s direction.

Once Baculi completed the GIS portion of the layers, they were sent off to Ginsherman to improve design, layout and to print. Ginsherman used PDF’s of the layers in adobe illustrator, and ensured map alignment by limiting the work to the same illustrator file and giving each map its own layer. Printing involved using a laser printer, specifically at the OCAD University Digital Print Centre. Previous draft layers were also created to test the colour combinations and the best level of transparency for the maps.

A key component of the piece was the Lightbox from Ginsherman’s previous work which was designed and built by Ginsherman and his father. The Lightbox is made of wood, acrylic glass, and LED lights which were screwed together. The Toronto boundary layer was the only layer not printed on a translucent sheet, but on the glass. The boundary along with the north arrow acted as guides to align the layering of the maps. The LED lights improved the clarity of the layering maps as well as directed attention to the piece.

The end result was presented on Ryerson’s 2017 GIS Day and consisted of a Lightbox with the Toronto boundary printed on top and a total of 12 translucent maps. A variety of combinations were possible for interaction and discussion for the attendees. Please see the YouTube video below!

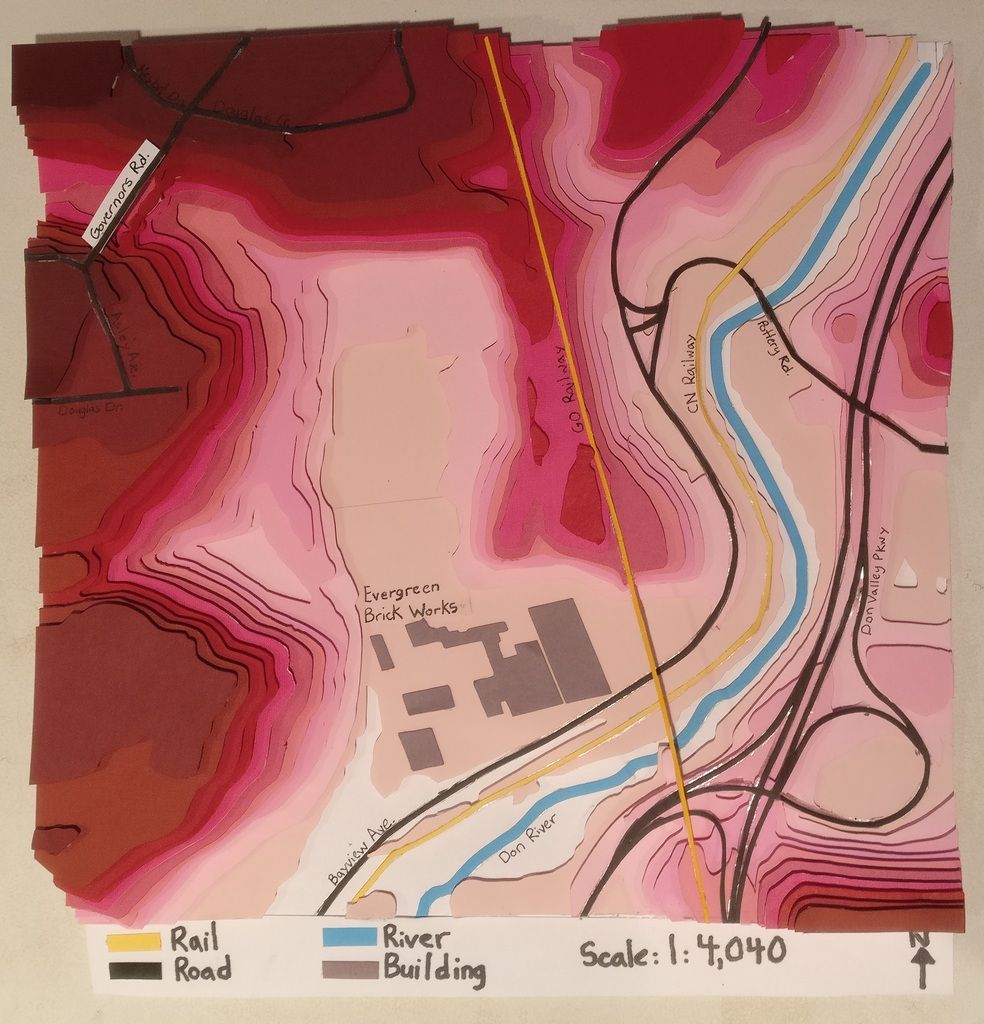
3D Paper Topography Map of Evergreen Brick Works and Its Surroundings

By Nicole Serrafero

Geovis Project Assignment @RyersonGeo, SA8905, Fall 2016

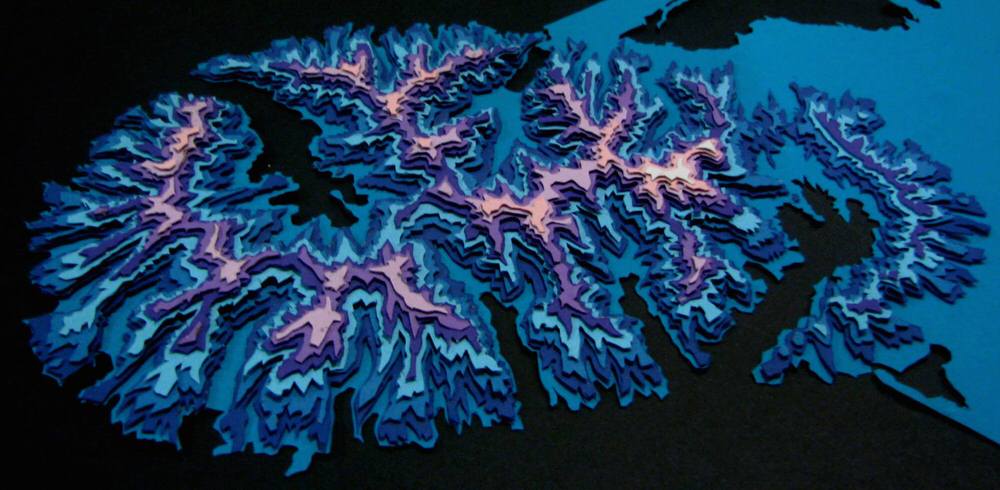
When learning about geography in the early years of school we had to trace and label contours based off topographic maps. For the purpose of the course work I decided to take inspiration from my younger school days and use modern technologies to attempt to reproduce a topographic map with cartographic elements included. My main inspiration came from an artist by the name of Sam Cadwell who creates beautiful works of arts using layers of paper to represent contours. An example of his work can be seen below and through the link to his website.

Example of Sam Cadwell's Work

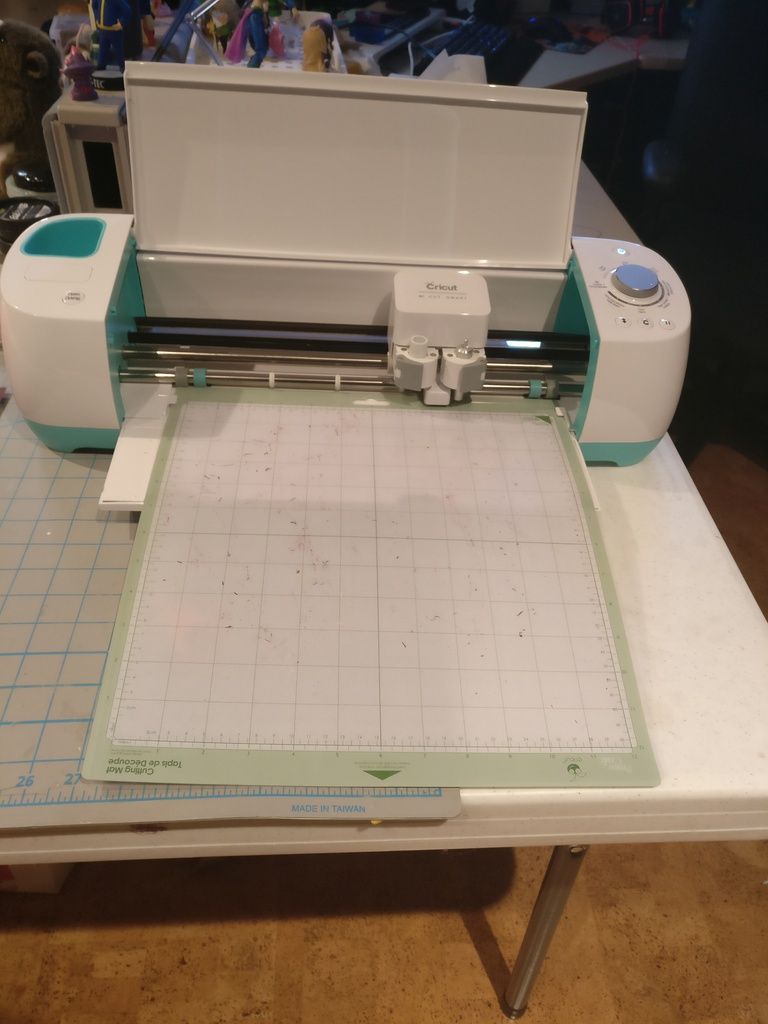
The project involved cutting out each contour layer and features using a Cricut machine which is computer guided paper cutter (seen below).

 photo IMG_20161107_123320_zps33mlcyg6.jpg

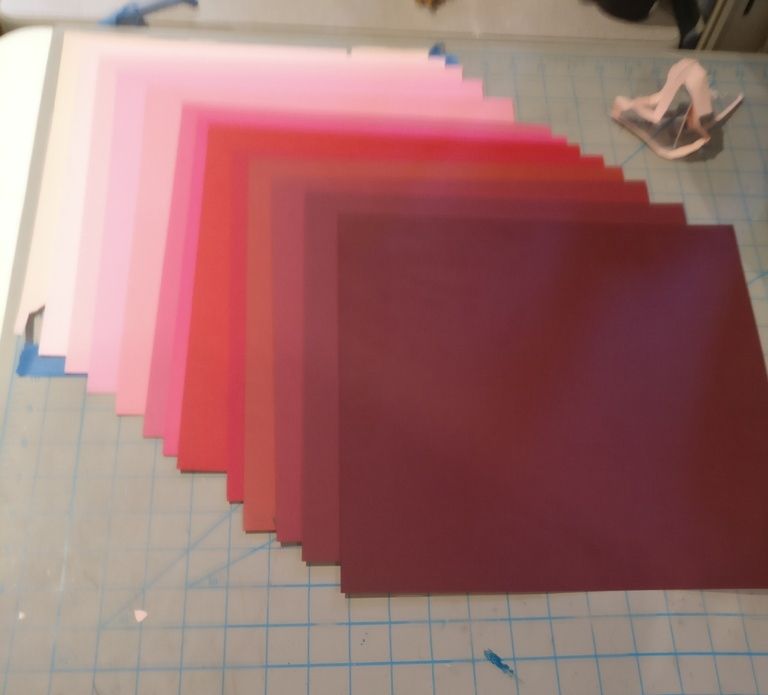
The maximum paper size that the cutter program can handle is 11” in x 11” so I ensured that the study area would fit within the paper size limitations. The paper used for the project was 12”x12” cardstock paper in a variety of colours to represent each feature. For the layers of contours, a pink to red colour scheme was used as it provided me with up to 15 layers of sequential colours.

 photo 0aa4f3c0-b318-4696-9a89-09c959f8483f_zpsdazdxid7.jpg

The water features were blue, the rail features yellow, the buildings a light purple, and the roads black.


Data Used

Four (4) datasets were used to produce the topographic model:

  • Contour Lines (Obtained from TRCA)
  • Building Footprints (Obtained from DMTI spatial)
  • Waterways (Obtained from TRCA)
  • Road and Rail Lines (Obtained from Statistics Canada)

Study Area Extraction

All of the files were loaded into ArcMap then all projected to WGS84 to ensure all files were in the same projection. The Evergreen Brick Works was chosen as the study area as its surrounding area contains interesting contours, roads, a major highway, railways, a river. To ensure that the study area was contained within the paper limitations the page size within ArcMap was set to 11” x 11” and the map view was adjusted until I was satisfied with the area. Once the final study area was chosen the features within the view were clipped out and saved as separate files. Below is a screen shot of what the final study area covers.

studyarea_ns

With the data now clipped the further data processing could be done easily as the amount of data was significantly reduced. The contour lines came as 1m intervals with a range of 22 individual contours levels which is too many levels for the amount of paper that I have available for the contours. The number of contours was reduced by selecting every 4 m contour then extracting the selected lines to a separate file. With the new file the number of layers was reduced to 12 layers which fits within my 15-layer limit. The remaining files did not need further processing within ArcMap.

The next major step to get the files ready for the paper cutter. To do this all layers were saved as scalable vector files (SVG) for each data set. To accomplish this all layers were turned off except for one dataset. Then the Export Map option was used to save the map area as an SVG file. The SVG files were then imported into a program called Inskscape to be edited further. Within the Inskscape program the contours were divided up into their individual 4m interval layers (seen below).

layers_ns

Some of the smaller contour lines were deleted as the cutter would not be able to cut the shape out. The other features were given a layer of their own as well. Each individual layer was then exported and saved as an 11”x11” page in JPEG format.  The program used to work the paper cutter did not work as well with files that came from ArcMap directly which was why Inkscape was used. It is also easier to edit/select the lines and change the thickness within Inkscape.


Printing and Assembling the Model

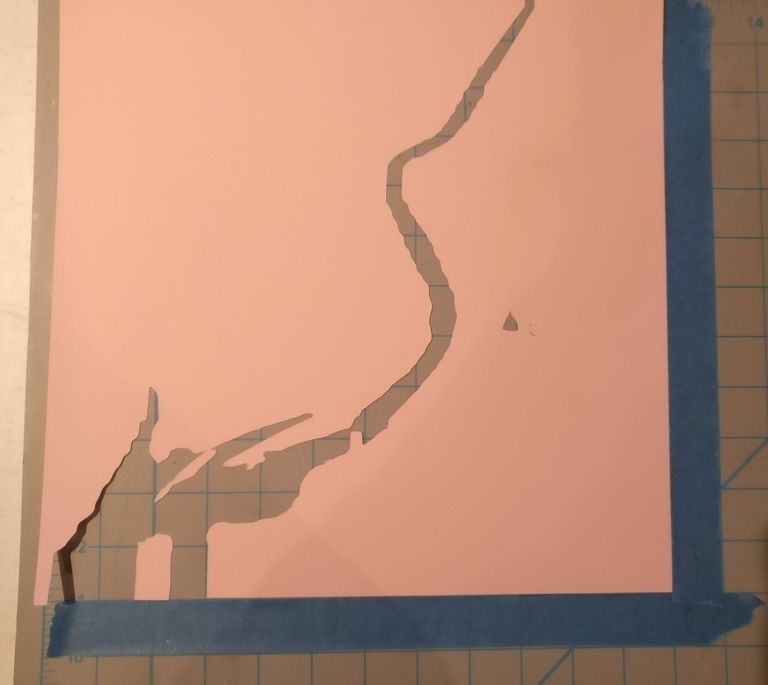
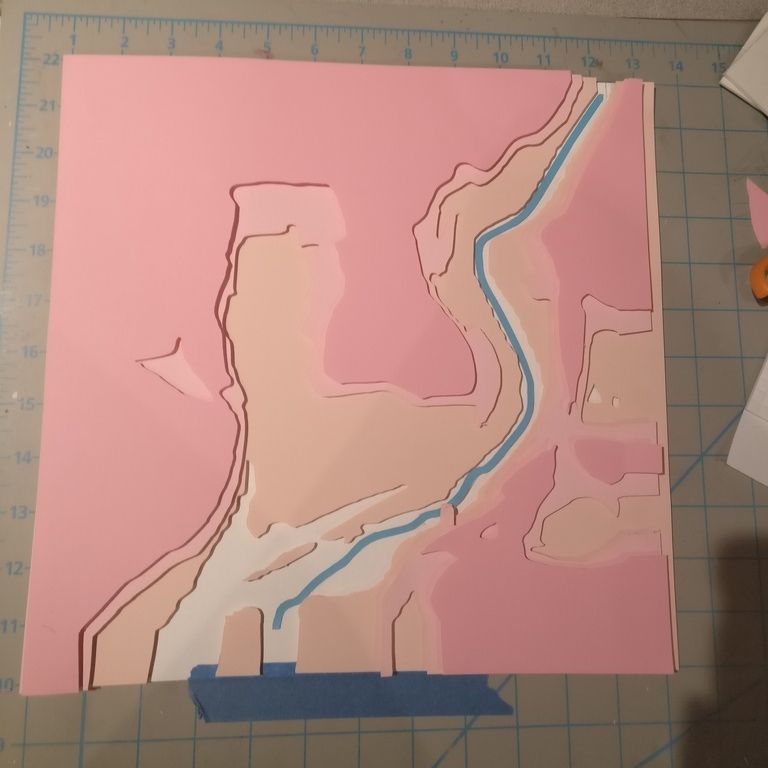
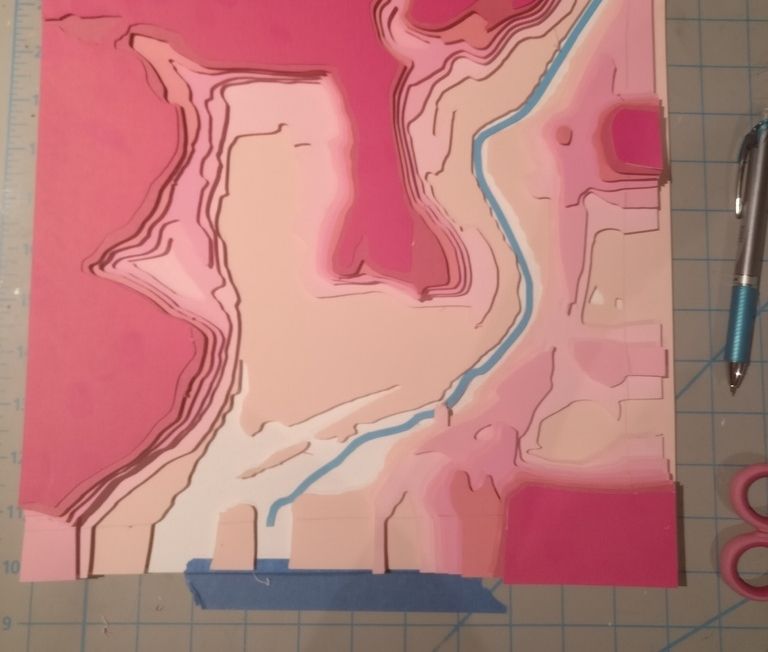
To cut our each layer the JPEG layers were imported into the paper cutter program. Each layer was placed on the canvas then the corresponding colour was placed on the cutting map and loaded into the machine. Once loaded the paper cutter proceeded with cutting the paper. An example of what a cut layer from the machine can be seen below.

 photo 21275b2f-1f16-4cae-8a18-7f725417c1b5_zpsdoaqnf9s.jpg

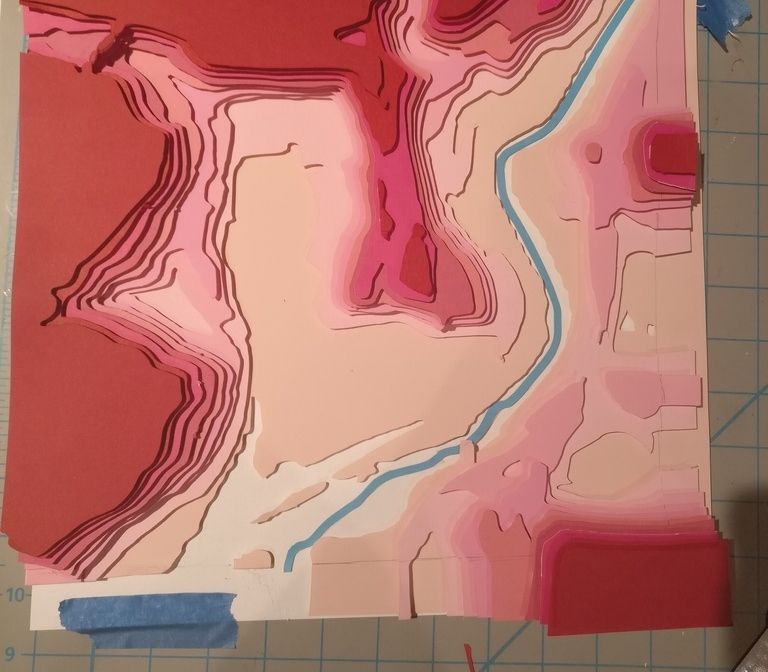
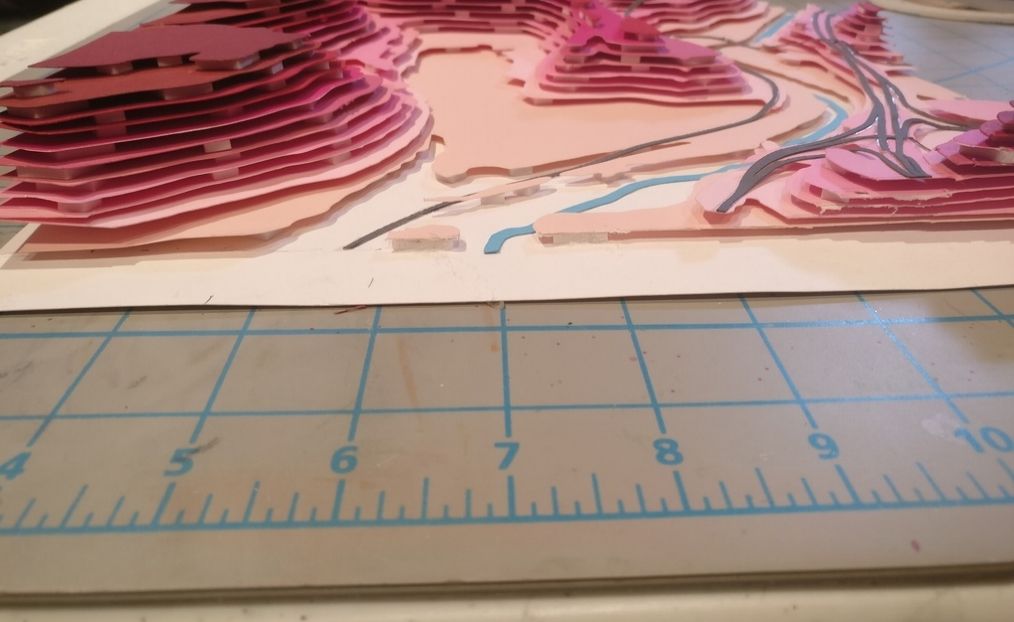
The contours were cut first followed by the river, then the roads and railway and last was the Evergreeen Brick Works buildings. Each contour layer was stuck together using foam spacers that had tape on each size. These spacers were used to create the illusion of height in the model. The remaining paper features were stuck on using double sided tape. The following images show the assembling process.

 photo d084f076-6a2f-4cde-a51d-73927be5435c_zpsth4idvyg.jpg

 photo c4d9c449-5152-4ef2-9c45-3d56c5f90dfb_zps4ebxn1v7.jpg

 photo db8a056f-1a67-4486-896f-87fdb407c8fe_zps5xwbnwea.jpg

 photo 5ebc99e9-6bf6-4f0b-8a88-a63f1bf7bee3_zpsrupmc76i.jpg

Once all of the paper layer were assembled the legend, scale, north arrow, and labels were added by hand. The final product can be seen below.

 photo IMG_20161113_221812_zpszfiofto3.jpg


West Don Lands Development: 2011 – 2015


CHRISTINA BOROWIEC
CHRISTINA BOROWIEC | West Don Lands Development: 2011 – 2015 | 3D Printing Tech.

Author: CHRISTINA BOROWIEC
Geovis Project Assignment @RyersonGeo, SA8905, Fall 2016


PROJECT DESCRIPTION:
The model displayed above is of the West Don Lands of the City of Toronto, bounded by Queen St. E to the north, the rail corridor to the south, Berkeley St. to the west, and Bayview Ave. to the east. In utilizing Ryerson University’s Digital Media Experience Lab’s three-dimensional printing technology, an interactive model providing a tangible means to explore the physical impact of urbanization and the resultant change in the city’s skyline has been produced. The model interactively demonstrates how the West Don Lands, a former brownfield, have intensified from 2011 to 2015 as a result of waterfront revitalization projects and by serving as the Athletes’ Village for the Toronto Pan Am/Parapan American Games.

Buildings constructed during or prior to 2011 are printed in black, while those built in 2012 or later are green. In total, 11 development projects have been undertaken within the study area between 2011 and 2015. Each of these development projects have been individually printed, and correspond to a single property on the base layer, which is identifiable by the unique building footprint. The new developments can be easily attached and removed from the base of the model (the 2011 building and elevation layer) via magnetic bases and footprints, thereby providing an engaging way to discover how the West Don Lands of Toronto have developed in a four year period. By interacting with the model, the greater implications of the developments on the city’s built form and skyline can be realized and experienced at a tangible scale.

Areas with the lowest elevation (approximately 74 m) are solidly filled in on the landscape grid, while areas with higher elevations (80 m to 84 m) have stacked grids and foam risers added to better exaggerate and communicate the natural landscape. These additions can be viewed in the video below.

Street names and a north arrow are included on the model, as well as both an absolute and traditional scale bar. The absolute scale of the model is 1:5,000.


PROJECT EXECUTION:
To complete the project, a mixture of geographic information system (GIS) and modeling software were used. First, the 3D Massing shapefile was downloaded from the City of Toronto’s OpenData website, and the digital elevation model (DEM) for Toronto was retrieved from Natural Resources Canada. Using ArcMap, the 3D Massing shapefile, which includes information such as the name, location, height, elevation, and age of buildings in the city, was clipped to the study area. Next, buildings constructed prior to or during 2011 were selected and exported as a new layer file. The same was done for new developments, or the buildings constructed from 2012 to 2015, with both layers using a NAD83 UTM Zone 17N projection. Once these new layers were successfully created, they were imported into ArcScene.

In ArcScene, the digital elevation model for Toronto was opened and projected in NAD83. The raster layer was clipped to the extent of the 2011 building layer, and ensured to have the same spatial reference as the building layer. Next, the DEM layer properties were adjusted so base heights were obtained from the surface, and a vertical exaggeration was calculated from the extent of the DEM in the scene properties. Once complete, the “EleZ” variable data provided in the building layers’ shapefiles were used to calculate and display building heights. The new developments 3D file was then exported, as the 2011 buildings and DEM files were merged. Since the “EleZ” (building height) variable was used rather than “Z” (ground elevation) or “Elevation” (building height from mean sea level), the two layers successfully merged without buildings extending below the DEM layer. The merged file was then exported as a 3D file. Although many technical issues were encountered at this point in the project (i.e. the files failed to merge, ArcScene crashed unexpectedly repeatedly, exported file quality was low…), the challenges were overcome by viewing online tutorials of users who had encountered similar issues.

Once the two 3D files were successfully exported (the new developments building file and the 2011 building file merged with the DEM), they were converted to .STL file types and opened in AutoDesk Inventor. Here, the files were edited, cleaned, smoothed, and processed to ensure the model was complete and would be accepted in Cura (3D printing software).


At Ryerson University’s Digital Media Experience Lab, the models were printed using the TAZ three-dimensional printer (pictured below). Black filament was used for the 2011 buildings and DEM layer, and green was used for the new developments. These colours were selected from what was currently available at the lab because they provided the greatest level of contrast. In total, printing took approximately 7 hours to complete, with the base layer taking about 5.5 hours and the new developments requiring 1.5 hours. The video above reveals the printing process. No issues were encountered in the utilization of the 3D printer, as staff were on-hand to answer any questions and provide assistance. Regarding printing settings, the temperature of the bed was set at 60°C, and the print temperature was set to 210°C. A 0.4 mm nozzle was used with a 20% fill density. The filament density was 1.75 mm, and a brim was added for support to the platform during printing. Although the brim is typically removed at the completion of a print, the brim was intentionally kept on the model for aesthetic purposes and to serve as a border to the study area.


TAZ 3D Printer


Once printing was completed, the model was attached to a raised base and street names, a north arrow, legend, absolute scale and scale bar, and title were added. Magnets were then cut to fit the new development building pieces, and attached both to the base layer of the model and the new developments. As a final step in the process, the model’s durability and stability were tested by encouraging family and friends to interact with the model prior to its display at the Environics User Conference in Toronto, Ontario in November 2016.


West Don Lands Development: 2011 - 2015 Project


RECOMMENDED ENHANCEMENTS:
To improve the project, three enhancements are recommended. First, stronger magnets could be utilized both on the new development pieces and on the base layer of the model. In doing so, the model would become more durable, sturdy, and easier to lift up to examine at eye level – without the worry of buildings falling over due to low magnetic attractiveness resulting from the thicker cardboard base on which the model rests. In relation to this, stronger glue could be used to better bind the street names to the grid as well.

Additionally, the model may be improved if a solid base layer was used instead of a grid. Although the grid was intended to be experimental and remains an interesting feature which draws attention, it would likely be easier for a viewer to interpret the natural features of the area (including the hills and valleys) if the model base was solid.

The last enhancement entails using a greater variety of filaments in the model’s production to create a more visually impactful product with more distinguishable features. For instance, the base elevation layer could be printed in a different colour than the buildings constructed in 2011. Although this would complicate the printing and assembly of the model, the final product would be more eye-catching.


DATA SOURCES:
City of Toronto. (2016, May). 3D Massing. Buildings [Shapefile]. Toronto, Ontario. Accessed from <http://www1.toronto.ca/wps/portal/contentonly?vgnextoid=d431d477f9a3a410VgnVCM10000071d60f89RCRD>.

Natural Resources Canada. (1999). Canadian Digital Elevation Data (CDED). Digital Elevation Model [Shapefile]. Toronto, Ontario. Accessed from <http://maps.library.utoronto.ca/cgi-bin/datainventory.pl?idnum=20&display=full&title=Canadian+Digital+Elevation+Model+(DEM)+&edition=>.


CHRISTINA BOROWIEC
Geovisualization Project
Professor: Dr. Claus Rinner
SA 8905: Cartography and Geovisualization
Ryerson University
Department of Geography and Environmental Studies
Date: November 29, 2016

CloudCities 3D Model of the Ryerson Campus

Justin Miron

Submission for GeoVis Project Assignment @RyersonGeo, SA8905, Fall 2016

Interactive City Models

One of the most useful visualization and planning tools used in urban planning and design is the 3D model: a to-scale representation of the built form of a city, its existing (and as-built) conditions and its proposed (or possible) conditions.  A 3D model effectively communicates information about the proportion, size, and distribution of structures and other urban elements, that when well made and presented is intuitively grasped by the people that are viewing it.

A principal drawback to most 3D models is that they are physical models, and they take a lot of time to create, to modify, and can only be shared with an audience who is physically present. One way to solve the this problem is to replace the physical with a 3D digital model (using 3D modelling software such as Rhino, ArchiCAD, Blender, Solidworks, etc.) and to share the models with other users.  Yet, there are drawbacks to this approach, too. For one, these models can only be shared with users that have the same (or similar) software of the kind that was used to create the model. For users who do not have the correct software, static or animated representations of the model are made which, while they can still convey information, do not allow the user make choices on what aspects of the model they want to view or explore.

Beyond this technical problem, the models are not geographic and they are not data-driven. Though they are spatial, they are not referenced to a location on the earth and they don’t contain attributes. There is no way to know what building or open space you are looking at without asking someone who is familiar with the model. Informal exploration is just too limited. One way to solve these problems is to store and view 3D model information in CloudCities.

CloudCities and the Ryerson Campus

CloudCities is a geographically-enriched 3D model viewing and storage platform. The graphical rendering is done through ThreeJS, a javascript library used to build and render 3D objects in a browser. It is one of several platforms that blend geographic information within a 3D environment (see here and here for further examples).

CloudCities allows users to upload 3D model information, such as a building, tree, vehicle, or terrain, as well as their attributes. Not all 3D information can be uploaded (for instance, stylized 3D lines or other non-geographic 3D visualizations are not generally possible). In addition to upload, CloudCities has several customization features that allow the model scene to be modified: sun/shadow settings; pre-set camera views and 3D slides; a search function; location comparison to OpenStreetMap; and dynamic attribute and 3D editing, which allows the user to dynamically modify/add to object attributes and to use basic 3D editing functions.

CloudCities is built to store and view 3D models (as opposed to general 3D visualizations), and specifically 3D models of cities (multiple buildings, blocks, terrain, etc.) so for this project I have built a model of the bulk of Ryerson University’s Campus in downtown Toronto.

Area used for the CloudCities model

A view of the entire model

Data

The input data for the model’s 3D buildings is from two sources: myself, who modelled several buildings on the Ryerson campus, including Kerr Hall, in Rhinoceros (Rhino), a 3D modelling program, and the City of Toronto’s Open Data portal, which maintains a 3D massing and building model dataset that is frequently updated and that is available in several formats.

The 3D information from the City of Toronto is of high quality, but it is released in several formats, and not all of these formats contain equivalent data. Out of all of the data available, the 3D CAD information is the most detailed and accurate but it is harder to work with.

Ultimately, all of the 3D information that fits within the sample area were converted, by individual building, into multipatch features using the ArcGIS 3D Analyst extension. These multipatches were loaded into ArcScene, exported to an ESRI 3D webscene format, and then uploaded into a CloudCities scene. While there are other ways to create a functional CloudCities scene, uploading from ArcScene is the most straightforward, though it is certainly not an option for everyone (see the Asset import tutorial), especially when they do not have ArcScene or 3D Analyst available to use!

original-rhino-models
Rhinoceros model of Kerr Hall (above) and a multipatch of the Ryerson Student Center (below)

I manually modelled Kerr Hall because I wanted it to be more detailed than that stored within the City of Toronto dataset. The modelling was done in Rhino. The model was then exported from Rhino into .3DS format, then to multipatch to be included into the webscene uploaded into CloudCities. Deletion of original building massing data from the City of Toronto dataset was required where another model instance – in this case, custom-models like that of Kerr Hall – takes its place. 

Zoning information is also provided by the City’s Open Data portal and this was used to code each building instance with its associated zone category (e.g. R or ‘Residential’).

I have customized and manually refined City blocks (which define the road surfaces) and green open space areas because these are not accurately captured within the City’s data.

Complex Data

Terrain surfaces and trees (which can be very complex objects) were not added to this model because of the eventual data size requirements, but in order for these elements to look good and not awkward, they must be of sufficient detail. Terrain published by the City of Toronto, even when simplified, is a complex geometry that would weigh on the model’s performance. In addition, terrain requires that buildings sit on top of the surface, but the buildings modelled by the City do not account for an uneven grade around the base (what is known as Finished Floor Elevation). While this detail can be made within the models, the eventual time required would have been onerous. The more detail in a building and the more the model approximates reality, the longer the model will take to create.

User Experience (UX) highlights

In the CloudCities model, buildings contain a name, whether they are Ryerson University buildings, the planning zone they fall within (e.g. commercial or residential), and the size of the building footprint area in sq.m. Some of this information is added within the pre-upload ArcGIS environment, but much of it is added from within CloudCities’ editing environment.

These attributes serve as the basis for dashboards and a search bar. The dashboard displays these vital statistics whenever a building object is clicked.


dashboard-for-statistics
Dashboard reveals attributes when a building is clicked.

Additionally, a search bar and search constraints can be set, and the user can search through the scene’s attributes to highlight objects that are returned. For instance, every building that has the zone ‘Commercial Residential’ is highlighted whenever that term is entered into the search. The search functions are limited, however – there are no advanced queries supported by CloudCities. Instead, various constraints on searches must be set on the back end to make sure that a particular search does not return any object that fulfills any small dimension of the attribute data.

Search results when "Commercial Residential" is entered
Search results when “Commercial Residential” is entered

Specific locations can be saved as bookmarks, and these aid in presentation purposes. These locations can be combined into a slideshow “tour” of the model. This is a particularly relevant feature when sending the model to others, as the locations are stored with the scene, and literally move the user point of view around the model in order to tell a story.

bookmarks
Camera bookmarks can help guide a user through the model

A sun/shade rendering tool can be implemented, which allows the user to set the time of year and time of day to create a realistic view of how shadows would be cast by model elements based on the model’s location on the earth, although this is not a sun shadow calculator and is meant simply to enhance the experience of the model.

sun-shade-comparison
Sun and shadow controls

Limitations of CloudCities

One of the main limitations of CloudCities is that it is not customizable from a development point of view. A user is limited to pre-set dashboard, search, and styling options. In addition, the platform costs money and is billed at a hefty $60 USD+/per month in order to create a city model to the detail that was made for this post.

The range of 3D visualizations possible is limited. It would be nice to have a platform that incorporates more options for presenting thematic data that goes beyond dashboards and search bars. There is a lot of 3D data that does not manifest itself in a 3D structure. ThreeJS’s gallery of 3D visualizations provides interesting examples of how 3D city modelling could be developed in the future.

Despite these limitations, CloudCities provides an easy-to-use platform for making and viewing 3D city models. I do not believe that CloudCities will always be the only platform that offers the same functionality, but it is currently a really good example of how urban planners and designers can take advantage of geo-technology to create a more interactive and data-rich experience of their 3D information.

The final model can be viewed on CloudCities hereAfter mid-December 2016, the model’s geographic extents will be greatly reduced so that the model can be stored on a free account.